Pins are a useful feature of Google Maps that let you save a location. You can drop a pin to save an address or mark a location if it doesn’t have an address or if the address is wrong.
Your pins will help you find these places again, and you can send them to your friends to let them know where to meet up.
Dropping the pin is a quick and easy way to use Google Maps that you will find useful. Here, we’ll show you how to use this method on your computer or mobile device.
Dropping Pins in Google Maps on Mobile
In the latest version of Google Maps, dropping a pin from the search box is much easier. In fact, it drops a pin automatically, whether you want it or not. It assumes that if you want to find a certain address, you want to drop a pin there.
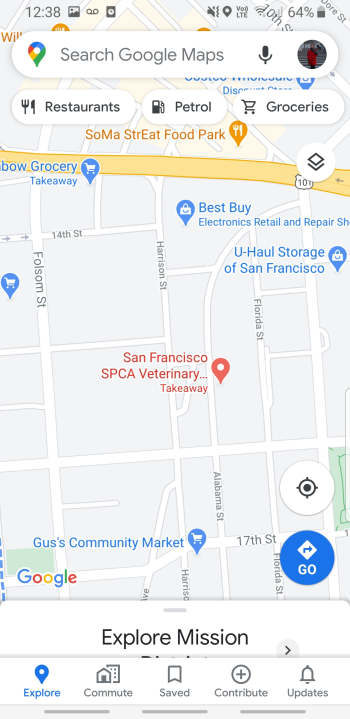
So when you type an address into the search box, a pin will be put there automatically. Even if you use the map instead of the search box to find a place, you still have to tap and hold.
Step 1: On your iPhone or Android phone, open the Google Maps app.
Step 2: Use the search bar at the top of the screen to look for an address, or scroll around the map until you find the spot where you want to drop a pin.
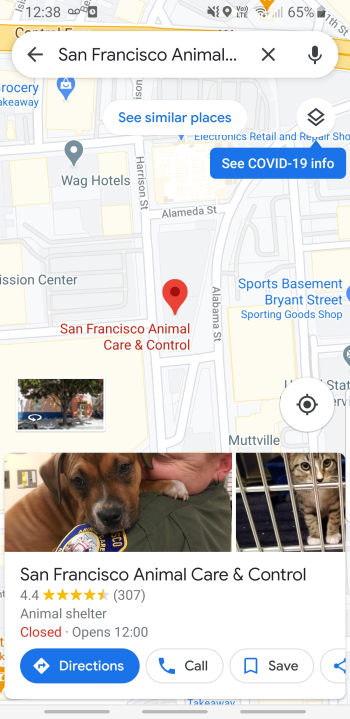
Step 3: To drop a pin, press and hold the screen. All it takes is a light touch.
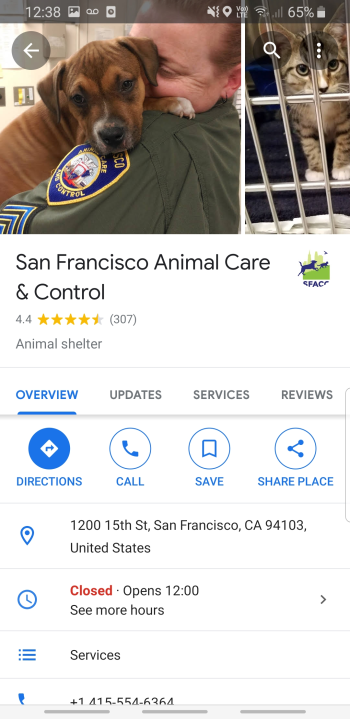
Step 4: Click on the pin to get directions to that place, which you can share or save.
Step 5: To get rid of a pin, just pinch it out. A box with the words “Dropped Pin or the Specific Location” and an “X” on the right will appear at the top. When you tap that X, the pin comes out.
Also Read: How to Repost on TikTok and Share Your Favorite Videos: A Step-by-Step Guide!
Dropping Pins in Google Maps on Computer
Step 1: Go to the website for Google Maps.
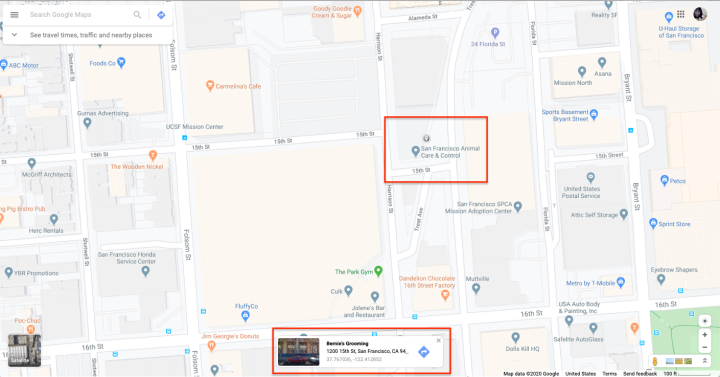
Step 2: Use the search bar in the upper left corner of the screen to look for an address or scroll around the map until you find the spot where you want to drop a pin. The place you searched for is marked with a pin by the search bar. There’s nothing else you need to do.
Step 3: Click the left mouse button where you want to put the pin. If there is already a marker where you want to drop a pin, you may have to zoom in or click a little to the left or right. A small gray pin and an information box will show up in the bottom right corner of the screen.
Step 4: Click the navigation icon in the info box to get directions to the dropped pin, or click anywhere else in the box to get more information about the location you’ve chosen.
Step 5: Click Save on the screen with more information to add the pin to Your Favorites, Want to Go, Starred Places, or a new list. Under “Your Places” in the main menu, you can see the pins you’ve saved.
Dropping Multiple Pins by Creating a Map on Desktop
You can save each of your pins in the Your Places file if you want to see them all at once. Be aware, though, that you can’t see all of your pins on one map because Google Maps only lets you see one pin per map.
If you want to put all of your pins on one map, you’ll have to make your own map. By making your own map, you can see the different pins in a simpler way and also see how they are connected geographically.
This is especially helpful when you want to find out how far apart and how close each of your favorite pinned places is to each other. Here are a few easy steps that will show you how to make your own Google Maps.
Step 1: Go to the website for Google Maps.
Step 2: We want to point out that you don’t have to be signed in to your Google account to leave individual pins. But if you want to save the pins, you have to be signed in. When you want to make a Google map, you must also sign in to your account.
Step 3: Tap the menu icon in the top left corner of your screen.
Step 4: After that, click on Your Places, then Map, and then Create Map.
There will be a new window that shows your new, customized Google map.
Step 5: Click “Untitled Map” to give your map a proper name. If you want, you can also type in a short description. When you are done, don’t leave without clicking Save.
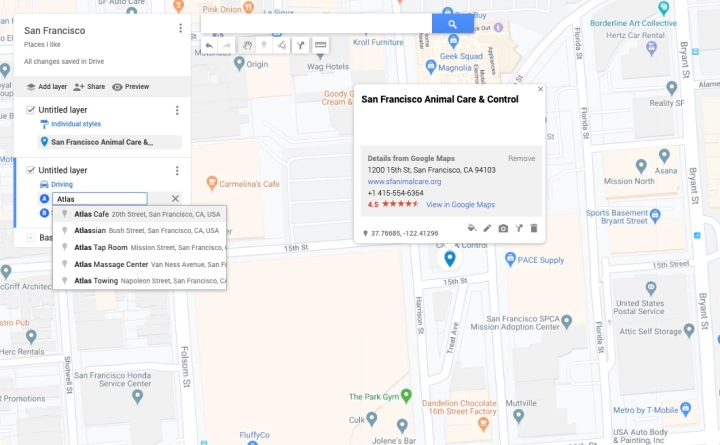
Step 6: Tap the marker icon to record a precise location (this is located right beneath the search bar). You can tap a certain place to add a marker for it, or you can use the search bar and type in the name of the place you want to find.
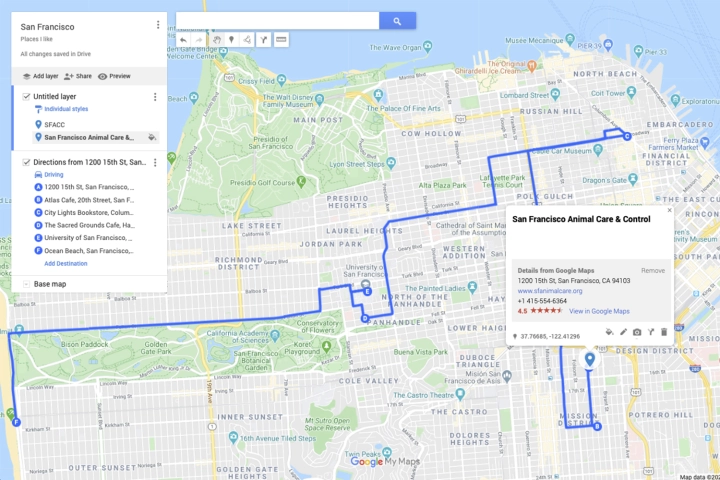
Step 7: Click the Add Directions icon in the bar of icons below the description of your first destination. You might see it pop up near the first marker at the top of the screen.
After you finish this step, you will see an A field and a B field in the bottom left corner of the page. From here, you can quickly search for a location and use the menu on the side to keep adding more. You’ll see that your map links to the places automatically.
Must Read: How Technology is Taking Entertainment to the Next Level
Step 8: If you only want to use this map for your own needs, the last step was the last step. There’s nothing else you need to do.
If you want to share your map with someone else, you’ll need to click on the icon in the top left corner. After you do this, you’ll be able to see a preview of your map before you share it.